How to create a Provisioning Profile in the Apple Developer Portal
In this guide, we’ll walk you through the process of creating an iOS App Development provisioning profile for the App ID ai.abra.*. This provisioning profile is required to run accessibility tests on physical ios devices.
Prerequisites
Before you start, ensure you have the following:
Apple Developer Account: Access to the Apple Developer Portal.
Created App ID:
ai.abra.*Registered iOS Devices: All the iOS devices you intend to use for testing should be registered in the Apple Developer Portal.
Valid Signing Identity: A valid
iOS Developmentcertificate installed on your Mac.
Confirm App ID
Log in to your Apple Developer account at developer.apple.com.
Navigate to the Identifiers section.
Check if
ai.abra.*is listed. If not, read: How to create Abra Wildcard Bundle ID.
Confirm registered devices
Navigate to the Devices section.
Verify that all your iOS devices are listed. If not, read: How to register iOS devices.
Create the development Provisioning Profile
Navigate to the Profiles section.
Click the "+" button to create a new profile.
Select iOS App Development under Development and click Continue.
Choose the App ID for
ai.abra.*and click Continue.Select the certificates that you intend to use for resigning. Make sure this certificate is installed in your
Keychainon your Mac.Select the iOS devices you wish to include in this profile. We recommend selecting all devices.
Click Continue, give your profile a meaningful name, e.g.
Abra Wildcard (15 devices)and click Generate.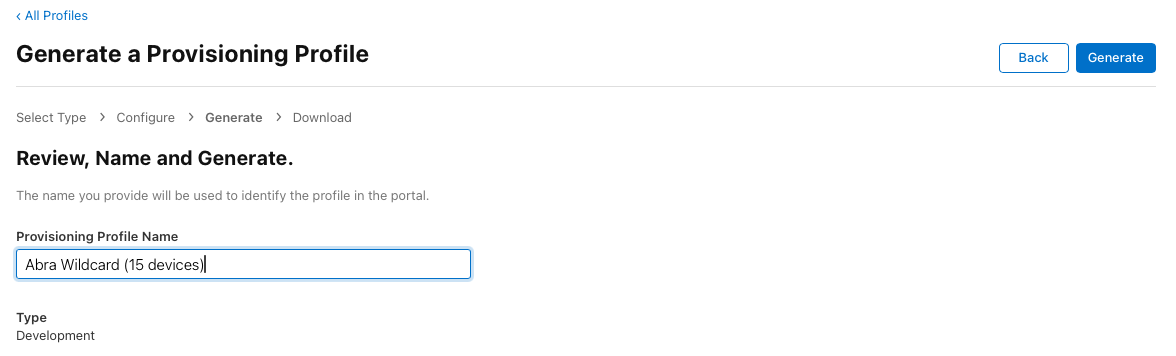
Download the generated Provisioning Profile.
Provide Abra Desktop with the Provisioning Profile
Open the Abra Desktop application.
Navigate to the Settings, select Resign tab and choose the Provisioning Profile segment.
Provide the downloaded Provisioning Profile.
Select the Certificate you chose when creating the Provisioning Profile.
Press the Resign button.
Upon completion of these steps, Abra Desktop should be able to run accessibility tests on your registered iOS devices.